How to Aim Your Headlights: The 25-Foot Wall Method
New LED bulbs or a fresh assembly and now you're blinding oncoming traffic — or lighting the treetops instead of the road? Any bulb or headlight swap moves your beam. Here's how to re-aim it properly with nothing but a wall, a tape measure, and ten minutes: the 25-foot method, the low/high-beam split, and the exact heights that keep you legal and glare-free.
Parts Covered in This Guide

Upgrading dim halogen headlights on any vehicle

Upgrading dim halogen headlights on any vehicle

A quick, direct-fit brightness upgrade

A quick, direct-fit brightness upgrade
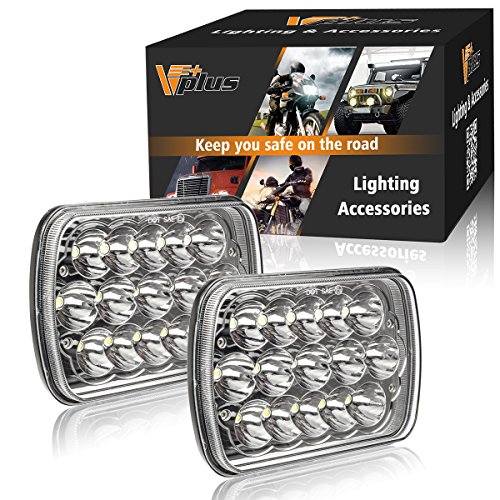
Classic and older vehicles needing a bright refresh
| Product | Owner Reviews | Availability | Best For | |
|---|---|---|---|---|
| 1,503 | $79.99 In Stock at Amazon | Upgrading dim halogen headlights on any vehicle | ||
| 949 | $171.13 In Stock at Amazon | Upgrading dim halogen headlights on any vehicle | Buy on Amazon
Prime Eligible
| |
| 20,055 | $44.99 In Stock at Amazon | A quick, direct-fit brightness upgrade | ||
| 22,538 | In Stock at Amazon | A quick, direct-fit brightness upgrade | ||
| 5,615 | $45.99 In Stock at Amazon | Classic and older vehicles needing a bright refresh |
You put in brighter LED bulbs or a fresh headlight assembly, and now something’s off. Oncoming drivers are flashing you. Or the road right in front of the car is dark while the light’s up in the trees. The bulb isn’t the problem — the aim is. Almost every bulb or housing swap nudges the beam, and re-aiming is the ten-minute step most people skip. This guide fixes that with nothing more than a flat wall, a tape measure, and a screwdriver.
Why this matters more than the bulb. A mis-aimed beam is the number-one reason a legal LED upgrade turns into a glare complaint or a fix-it ticket. Get the aim right and even an aggressive white beam stays courteous and road-legal. Get it wrong and the best bulb on the market blinds everyone.
When you actually need to re-aim
Not every job requires it, but these do — check the aim any time you:
- Install a complete headlight assembly (new, aftermarket, or used OEM) — always.
- Switch to LED conversion bulbs. LEDs often seat slightly differently than the halogen they replace, moving the hot spot and the pattern. See How to Install LED Headlights.
- Change ride height — a lift kit, lowering springs, new suspension, or even a trunk full of cargo tilts the whole car and points the beams up or down.
- Notice glare complaints, flashing, or a beam that lights too high or too low after any recent work.
A straight same-type bulb swap usually holds its aim, but it costs nothing to verify — so when in doubt, check.
What you need
- A flat vertical wall (a garage door works) and level ground for 25 feet in front of it.
- A tape measure, painter’s tape or a marker you can wipe off, and a screwdriver or hex/Torx driver for the adjuster screws.
- Roughly half a tank of fuel, normal tire pressures, and no unusual load in the car — aim to the car’s everyday condition. Bounce the suspension a few times to settle it before you measure.
The 25-foot wall method, step by step
This is the standard DIY procedure and it’s more than accurate enough for a legal, glare-free beam.
-
Position the car. Park it straight and square to the wall, front bumper nearly touching, then measure and roll it straight back until the front of the headlights is 25 feet from the wall. Keep the ground level the whole way — a slope throws the numbers off.
-
Mark the headlight height. Measure from the ground to the center of each headlight lens. Run a strip of tape across the wall as a horizontal centerline at that exact height. This line is your reference for everything that follows.
-
Mark the centers. Measure the distance between the centers of your two headlights, and mark two vertical lines on the wall directly ahead of each headlight’s center. You now have a cross for each side.
-
Turn on the low beams. Cover one headlight (a towel or piece of cardboard) so you’re only reading one beam at a time. Identify the beam’s hot spot (reflector housing) or its flat horizontal cutoff line (projector housing). Not sure which you have? Projector vs. Reflector Headlights shows you how to tell in five seconds.
-
Set the vertical aim. The top of the hot spot — or the projector cutoff — should sit at or just below the horizontal centerline, about 2 inches below it at 25 feet. That slight downward tilt is what lights the road ahead while keeping the beam out of oncoming drivers’ eyes. Use the vertical adjuster screw to raise or lower it to the mark.
-
Set the horizontal aim (if adjustable). The hot spot should sit at or just to the right of the vertical line for that headlight (in right-hand-traffic countries), never angled left toward oncoming traffic. Many cars only have a vertical adjuster — if so, leave horizontal alone.
-
Repeat for the other side, then uncover both and sanity-check that the two beams look even and symmetrical.
The heights at a glance
| Beam | Where its top/hot spot lands at 25 ft | Why |
|---|---|---|
| Low beam | At or ~2” below the headlight-center line | Lights the road without glaring oncoming traffic |
| High beam | At the centerline height (level, straight ahead) | Reaches far down the road; only used when no one’s oncoming |
| Fog lights | At or below fog-lamp-lens height | Lights the road surface; never bounced up into fog/rain |
The single most important number is the low-beam one: top of the beam at or just below headlight height. If you remember nothing else, aim low.
Finding and turning the adjusters
Most headlights adjust with one or two screws on or behind the assembly — commonly a Phillips, hex, or Torx head. Typically there’s a vertical adjuster and, on some vehicles, a horizontal one. Work with the engine off but lights on, turn slowly, and re-check the wall after each adjustment.
If an adjuster is stripped, seized, or snapped off — common on older cars and after a housing has been out — you have two clean fixes: replacement adjuster hardware/screws, or, if the mounting tabs themselves are broken, a complete used OEM assembly that comes with intact adjusters. The eBay Motors rail below points at both. For a new complete unit instead, the led-headlights category has DOT-approved assemblies with working adjusters out of the box.
Two ways to source what you need
Route 1 — New bulbs & assemblies with proper adjusters (Amazon)
If the aim is off because you’re upgrading anyway, start with a reflector-matched LED bulb or a complete DOT-approved assembly — both aim cleanly when installed to spec. The most-reviewed white LED options across bulbs and led-headlights are featured below; pair them with the install guide so the beam pattern is right before you fine-tune it on the wall.
Route 2 — OEM adjuster hardware & used assemblies (eBay Motors)
When the housing is fine but the adjuster screw, gear, or mounting tab is broken, eBay Motors is where the OEM small parts and low-mileage donor assemblies live — often for a fraction of a new unit. Match the part number to your exact year and trim, and check listing photos for intact adjuster gears. The rail below points straight at adjuster kits, used OEM assemblies, and optical aimer tools.
Common aiming mistakes
- Aiming too high “to see better.” It doesn’t help you and it blinds everyone else. Keep low beams below headlight height.
- Measuring on a slope. Even a gentle driveway grade tilts the reading. Find level ground.
- Forgetting to re-aim after a lift or load. Ride-height changes are the sneakiest cause of suddenly-glaring headlights.
- Aiming both beams at once. Cover one so you can tell which hot spot you’re actually moving.
- Blaming the bulb when it’s the housing. If the aim is dead-on and it still scatters, you likely have an LED in a reflector housing that can’t control it — or the wrong bulb size/type — not an aiming problem. And if the beam flickers while you work, that’s a wiring/CANbus issue, not aim.
The bottom line
- Any assembly swap, LED conversion, or ride-height change moves your aim — re-check it.
- Park 25 feet from a level wall, mark the headlight-center height, and set the low-beam top at or ~2” below that line.
- High beams aim level and straight; fog lights aim low.
- One adjuster screw fixes most of it — and if the adjuster’s broken, OEM hardware or a used OEM assembly on eBay Motors is the cheap fix.
Ten minutes and a wall is all it takes to turn a beam that gets you flashed into one that lights the road perfectly — and keeps you on the right side of the law.
Related reading
- How to Install LED Headlights — the install that comes right before aiming
- Are LED Headlights Legal? — why aim, color, and glare are what actually get you ticketed
- Projector vs. Reflector Headlights — why the housing decides whether a bulb glares
- Choosing Headlight Bulb Sizes — get a reflector-friendly bulb that aims clean
- Headlight Color Temperature Explained — pick a legal, effective white
Shopping used or OEM? Try eBay Motors
Live listings for the parts covered in this guide — prices set by the seller.
Recommended Parts for This Guide
UNI-SHINE 2PCS 7-Inch LED Headlights - DOT Approved, Hi/Lo Beam, Compatible with Jeep Wrangler, Chevy, and Miata - Plug and Play
1,503 owner reviews
UNI-SHINE 2PCS 7-Inch LED Headlights - DOT Approved, Hi/Lo Beam, Compatible with Jeep Wrangler, Chevy, and Miata - Plug and Play. Brighter, whiter LED output that upgrades your vehicle from dim halogen — longer life, lower draw, and easy plug-and-play install.
- Brighter LED output
- Longer service life
MOVOTOR LED Headlight Assembly for 1988-1998 Chevy/GMC Silverado Tahoe | 500% Bright Anti-glare Hi/Low Beam,Welcome DRL Amber Turn Signal Light,Plug N Play,fit OBS C/K 1500 2500 3500 Suburban Yukon
949 owner reviews
MOVOTOR LED Headlight Assembly 500% Bright Anti-glare Headlights with Welcome DRL Turn Signal Compatible with 1988-1998 Chevy GMC C/K 1500 2500 3500 Suburban Silverado Tahoe Yukon. Brighter, whiter LED output that upgrades your vehicle from dim halogen — longer life, lower draw, and easy plug-and-play install.
- Brighter LED output
- Longer service life
SEALIGHT H4/9003 LED Light Bulb, 1:1 Real Size, 1000% Brighter than Origin, 60,000LM Super Output, 6500K Cool White with 25000RPM Fan, 3Mins Plug and Play, Pack of 2
20,055 owner reviews
SEALIGHT H4/9003 LED Light Bulb, 1:1 Real Size, 900% Brighter than Origin, 46,000LM Super Output, 6500K Cool White with 25000RPM Fan, 3Mins Plug and Play, Pack of 2. A direct-fit replacement headlight bulb — match the size your vehicle needs for a clean, bright upgrade.
- Direct-fit sizing
- Bright upgrade output
SEALIGHT 9005 H11 Bulbs,100,000LM 900% Brightness HB3 H8/H9 Light Bulbs, 6500K Cool White Bulbs with 15000RPM Fan, Plug and Play ATV/UTV, 10-Year Extended Lifespan IP68 Waterproof, Pack of 4
22,538 owner reviews
SEALIGHT 9005 H11 Bulbs,40000LM 900% Brightness HB3 H8/H9 Light Bulbs, 6500K Cool White Bulbs with 15000RPM Fan, Plug and Play ATV/UTV, 10-Year Extended Lifespan IP68 Waterproof, Pack of 4. A direct-fit replacement headlight bulb — match the size your vehicle needs for a clean, bright upgrade.
- Direct-fit sizing
- Bright upgrade output
Partsam 2PCS Rectangle H6054 LED Headlights 5x7 7x6 Headlamp Hi/Low Sealed Beam H4 9003 Plug 6054 H5054 Compatible with S10 Blazer Express Van/Wrangler YJ XJ Cherokee Truck Van
5,615 owner reviews
Partsam 2PCS Rectangle H6054 LED Headlights 5x7 7x6 Headlamp Hi/Low Sealed Beam H4 9003 Plug 6054 H5054 Compatible with S10 Blazer Express Van/Wrangler YJ XJ Cherokee Truck Van. A direct sealed-beam replacement (or modern LED sealed-beam upgrade) for classic and older vehicles.
- Direct sealed-beam fit
- Classic-vehicle friendly